Better Engine Performance Starts With A Connecting Rod Balancer
Learn how to use a connecting rod balancer to weight match your engine's rotating assembly with the top tools from Proform and Speedway Motors.
This site contains affiliate links, and we may earn a commission at no extra cost to you. All recommended products are thoroughly vetted.
When building a high-performance engine, precision is everything. You can have the best cylinder heads, a perfectly machined block, and high-compression pistons. Still, if your rotating assembly isn't balanced, you’re leaving horsepower on the table and risking catastrophic failure. One often overlooked but crucial step in this process is ensuring your connecting rods are perfectly weight-matched.
While many enthusiasts send their parts out to a machine shop for this work, learning to do it yourself can save money and give you the satisfaction of a job well done. With the right connecting rod balancer tool, you can achieve factory-level precision (or better) right in your own garage. This guide will walk you through what these tools are, why they matter, and how to use them to build a smoother, longer-lasting engine.
Introduction to Connecting Rod Balancing Tool
Engine balancing is the process of equalizing the weight of the moving parts within the engine's bottom end. The connecting rods connect the pistons to the crankshaft, transferring the immense force of combustion into rotational motion. Because they are moving at thousands of RPM, even a tiny difference in weight between rods can create significant vibration.
If you skip balancing rods, the consequences can be severe. An imbalanced rotating assembly causes excessive vibration that eats up bearings, stresses the crank, and robs the engine of power. Over time, this imbalance leads to premature engine wear and can even cause structural failure at high speeds. To get the most out of your build, every rod must have the same total weight, and, more importantly, the weight must be distributed identically between the big and small ends.

Introduction to Engine Components
Every high-performance engine is a symphony of moving parts, each playing a vital role in delivering power and reliability. Among these, connecting rods, pistons, and the crankshaft form the backbone of the engine’s rotating assembly. The precise interaction of these components determines not only how much power your engine can produce, but also how smoothly and reliably it operates over time.
Connecting rods are especially critical, as they bridge the gap between the pistons and the crankshaft, transferring the force of combustion into rotational movement. For optimal engine balancing, it’s essential to ensure that the total rod weight, including both the big end and small end, is consistent across all rods in the set. Even a small difference in weight can lead to unwanted vibrations, which may cause premature wear or even catastrophic engine failure.
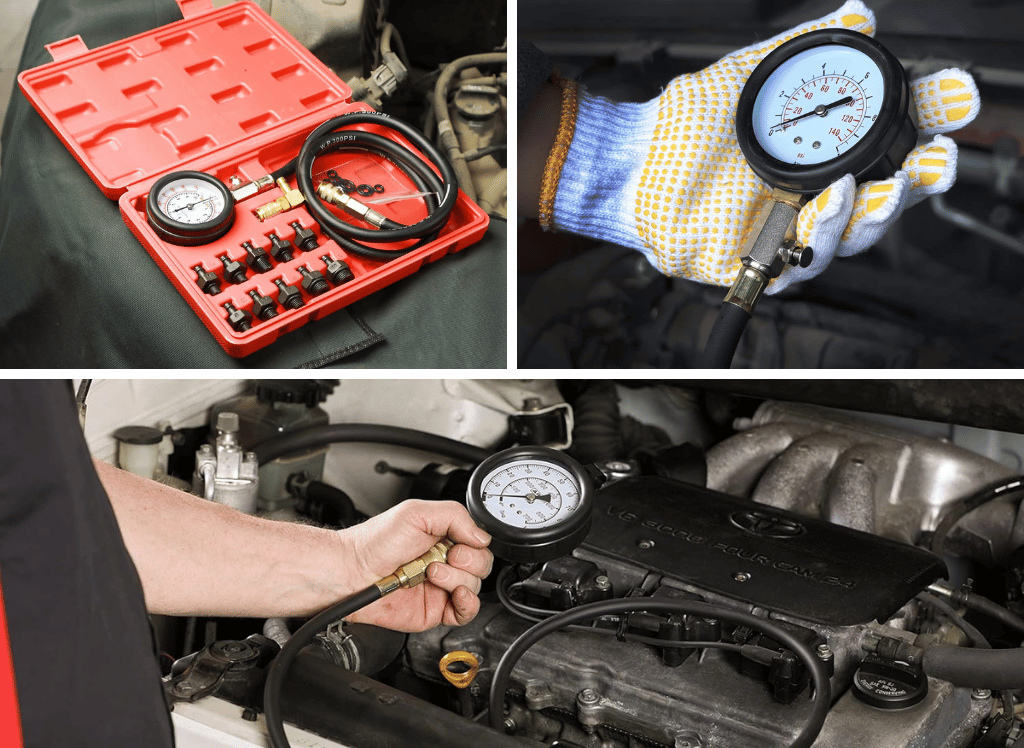
Achieving a perfect weight match requires careful measurements and attention to detail. Using a cheap scale can introduce errors, so investing in a high-quality digital scale is a must for anyone serious about balancing rods. The process typically involves removing material from the rod cap or the small end of the rod to bring heavier rods in line with the lightest one. This meticulous approach to engine balancing ensures that the rotating assembly operates smoothly, maximizing both performance and longevity.
What is a Connecting Rod Balancing Tool for Measuring Total Rod Weight?
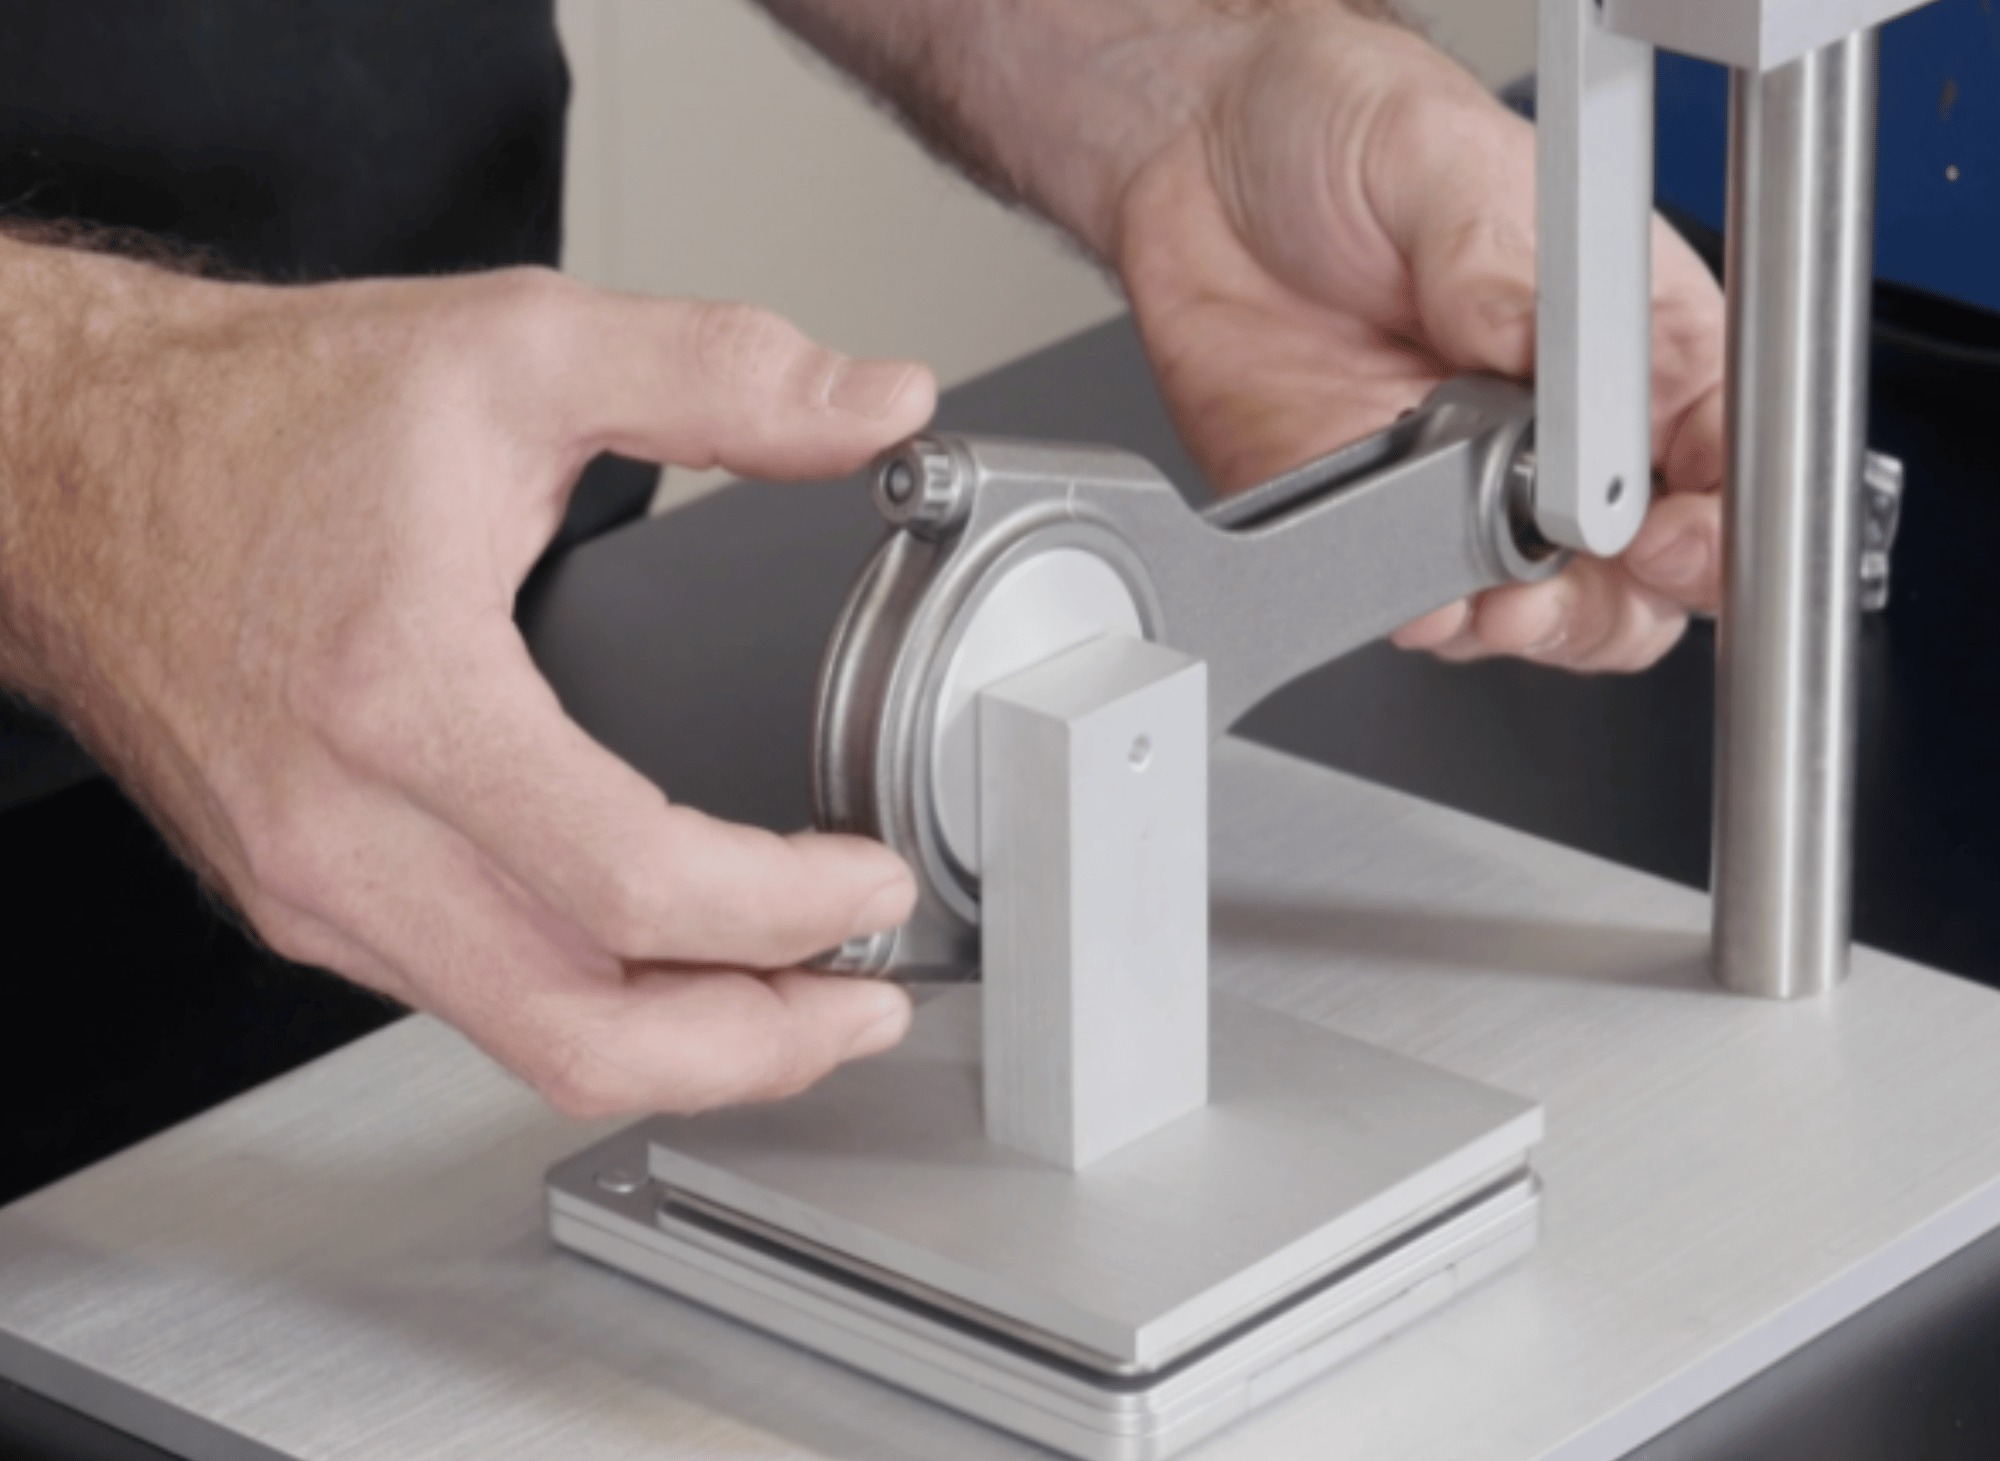
A connecting rod balancing tool is a specialized fixture designed to support a connecting rod in a way that allows you to weigh each end independently. You cannot simply place a rod on a scale to get the necessary data. Because a connecting rod has two distinct ends, the big end (which attaches to the crank) and the small end (which attaches to the piston pin), you need to know the specific weight of each end to balance the rotating assembly correctly.
The tool works by holding one end of the rod in a fixed, level position while the other end rests on a scale. Many commercially available connecting rod balancing tools utilize a fixture that isolates each end of the rod for weighing. It is important to align the rod at its center during the balancing process to ensure accurate and consistent measurements. The balancing process involves measuring and adjusting the weight distribution of the entire rod, not just one end, to achieve proper engine performance.
This setup eliminates the influence of the total rod weight on the measurement, allowing you to isolate the big-end weight and small-end weight. By using this jig, you ensure that every rod in your engine has equal weight distribution, which is critical for calculating bob weights and ensuring smooth operation. Modern setups often pair a high-quality jig with a precise digital scale rather than a traditional beam scale. A digital scale can be used to weigh connecting rods for balancing purposes.
Types of Connecting Rod Balancing Tools
There are generally two approaches to balancing tools available for the home builder and professional shop: manual mechanical fixtures and digital setups. Homemade connecting rod balancing tools can also be constructed using basic materials like wood and bearings.
Manual balancing tools often use simple mechanical fixtures. In custom jigs, washers are often used to provide a tight, stable fit for bearings and set screws, ensuring accurate and repeatable measurements. Additionally, wood, such as MDF or hardwood, can be used to construct support structures for homemade balancing jigs.
Manual Balancing Tools
Manual balancing tools are the most common in DIY workshops. These are mechanical stands made of durable metal, often aluminum or steel, designed to hold the rod perfectly horizontal. A prime example is the Speedway Motors Connecting Rod Balancing Stand.
This tool features an all-aluminum construction that is lightweight yet sturdy. Its key features include precision bearing-mounted support arms that allow for friction-free movement, ensuring that the measurement you see on the scale is accurate. It includes a precision rod weight fixture designed to hold the rod securely without introducing variables. This type of stand is a sophisticated fulcrum that allows you to weigh one end of the rod while the other is supported.
Digital Balancing Tools
While the stand itself is usually mechanical, the "digital" aspect refers to the scale used in conjunction with the fixture. Modern setups often pair a high-quality jig with a precise digital scale rather than a traditional beam scale.
While you might be tempted to use a cheap scale from the kitchen, engine balancing requires a scale that measures in grams with high sensitivity. Some advanced industrial systems use digital force gauges and automated sensors, but for most custom builds, a manual fixture paired with a high-accuracy digital scale is the standard method.
Brands and Models
If you are looking to buy a connecting rod balancer, there are a few reputable options on the market that cater to different budgets and needs.
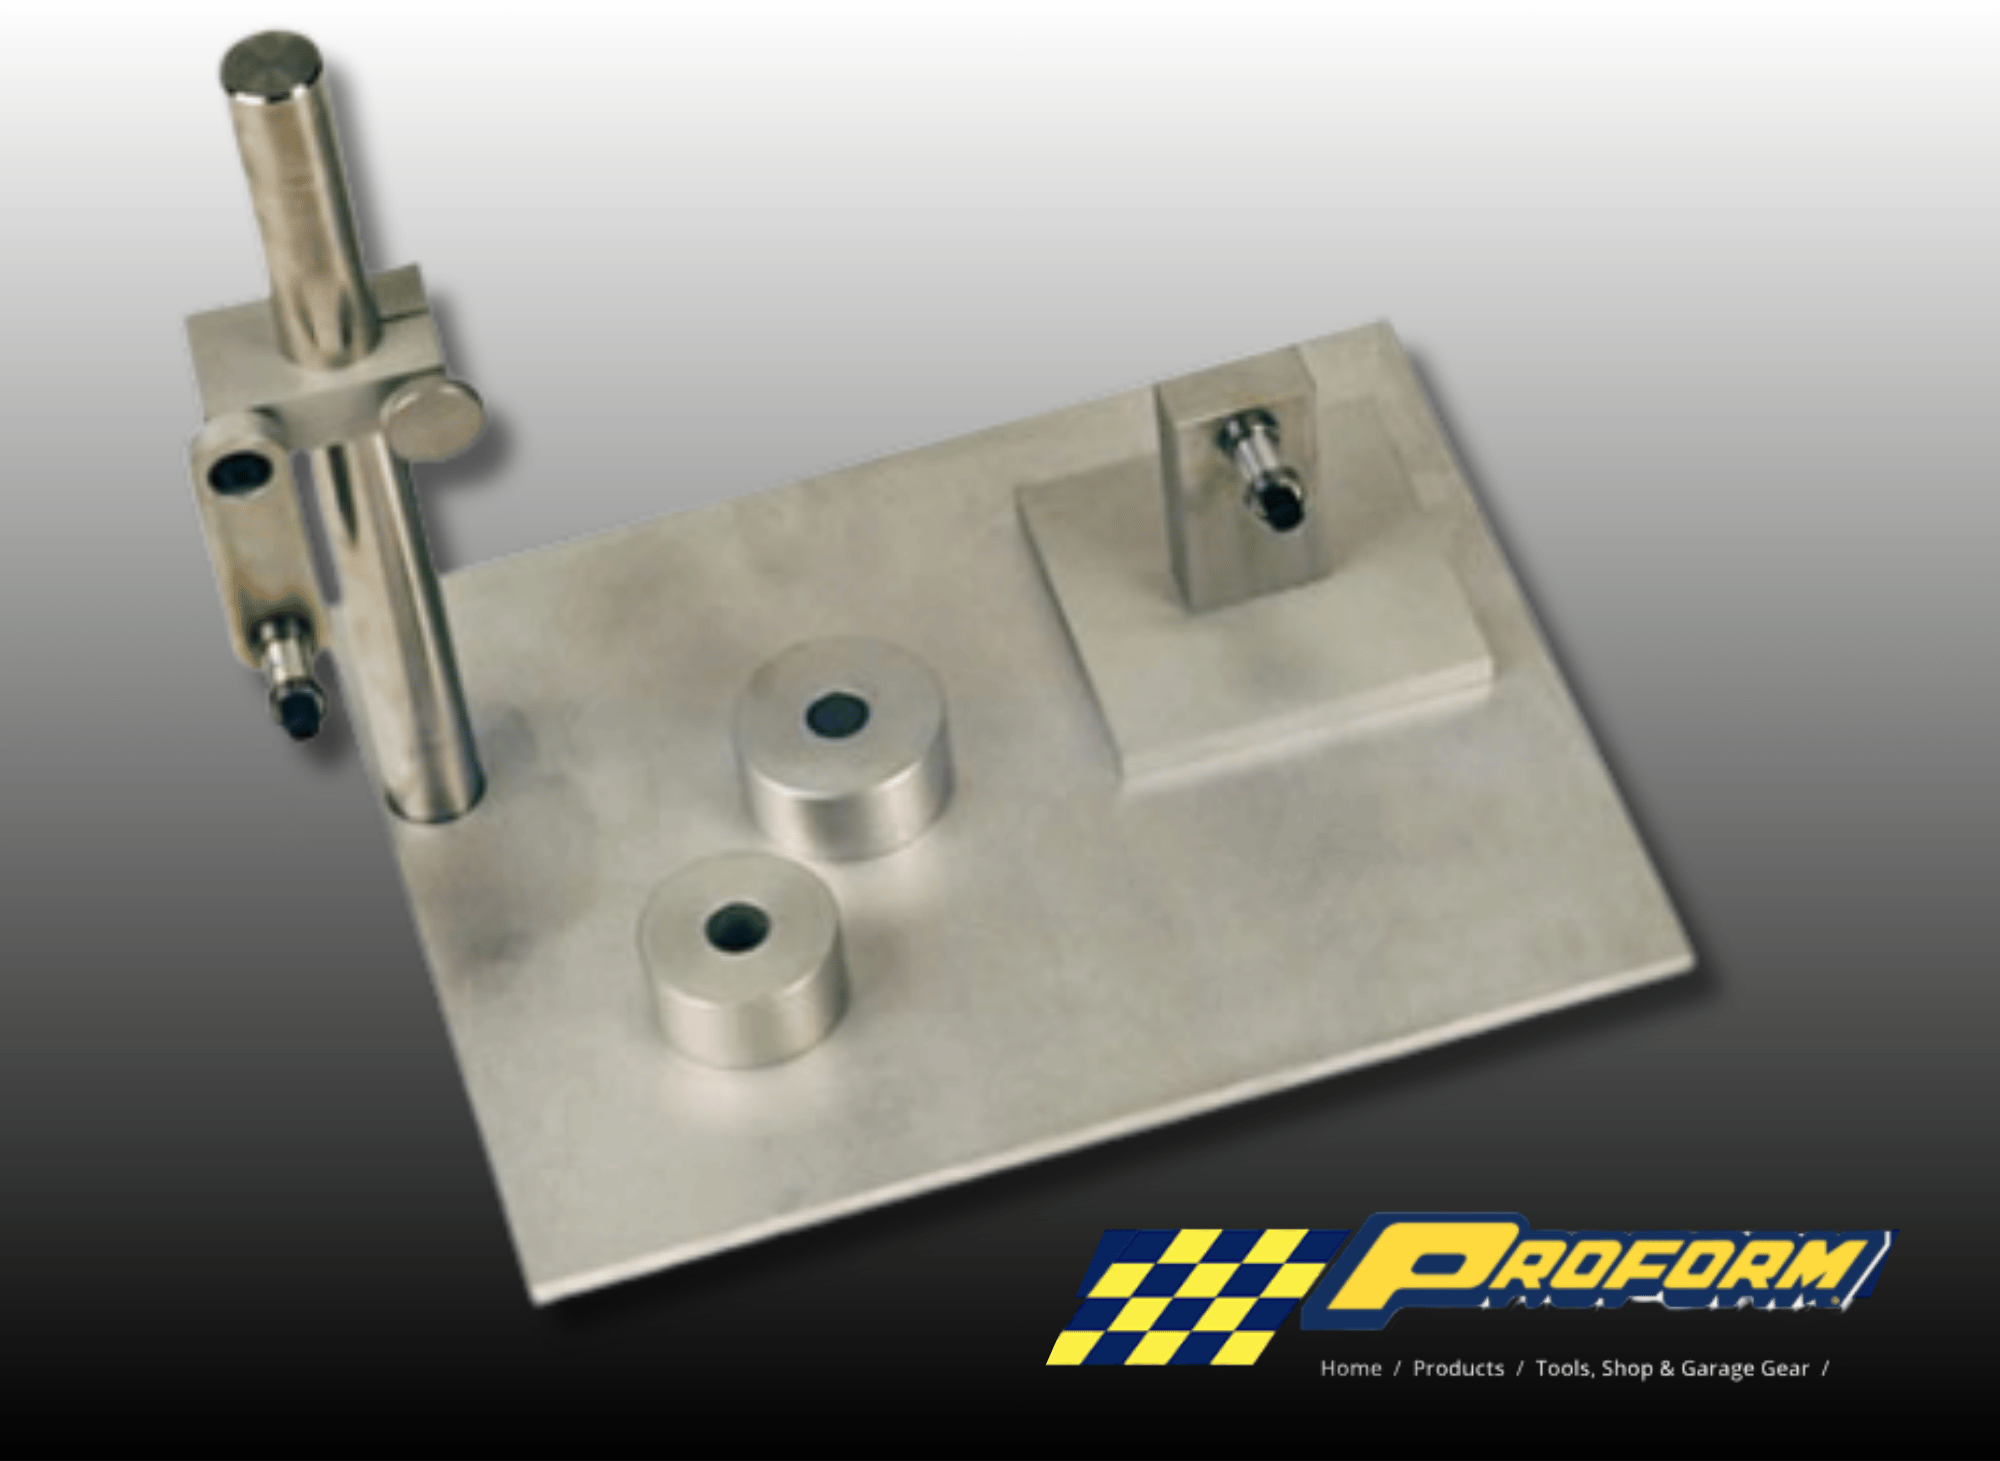
Proform Connecting Rod Balancing Tools 66844
Connecting Rod Balancing Tool, Aluminum/Steel, Natural, Universal, Kit
Proform Connecting Rod Balancing Tools 66844
Proform is a well-known name in engine-building tools. Their model 66844 is a popular choice for enthusiasts.
- Specifications: This universal kit is designed to fit a wide variety of rod sizes.
- Material: It is constructed from a robust mix of Aluminum and Steel, ensuring it can handle the weight of heavy V8 rods without flexing.
- Color: The tool comes in a Natural finish.
- Kit: It is sold as a complete kit, meaning you get the necessary hardware to set up the fixture.
- Price: At approximately $272.99, it represents a mid-range investment for a serious tool.
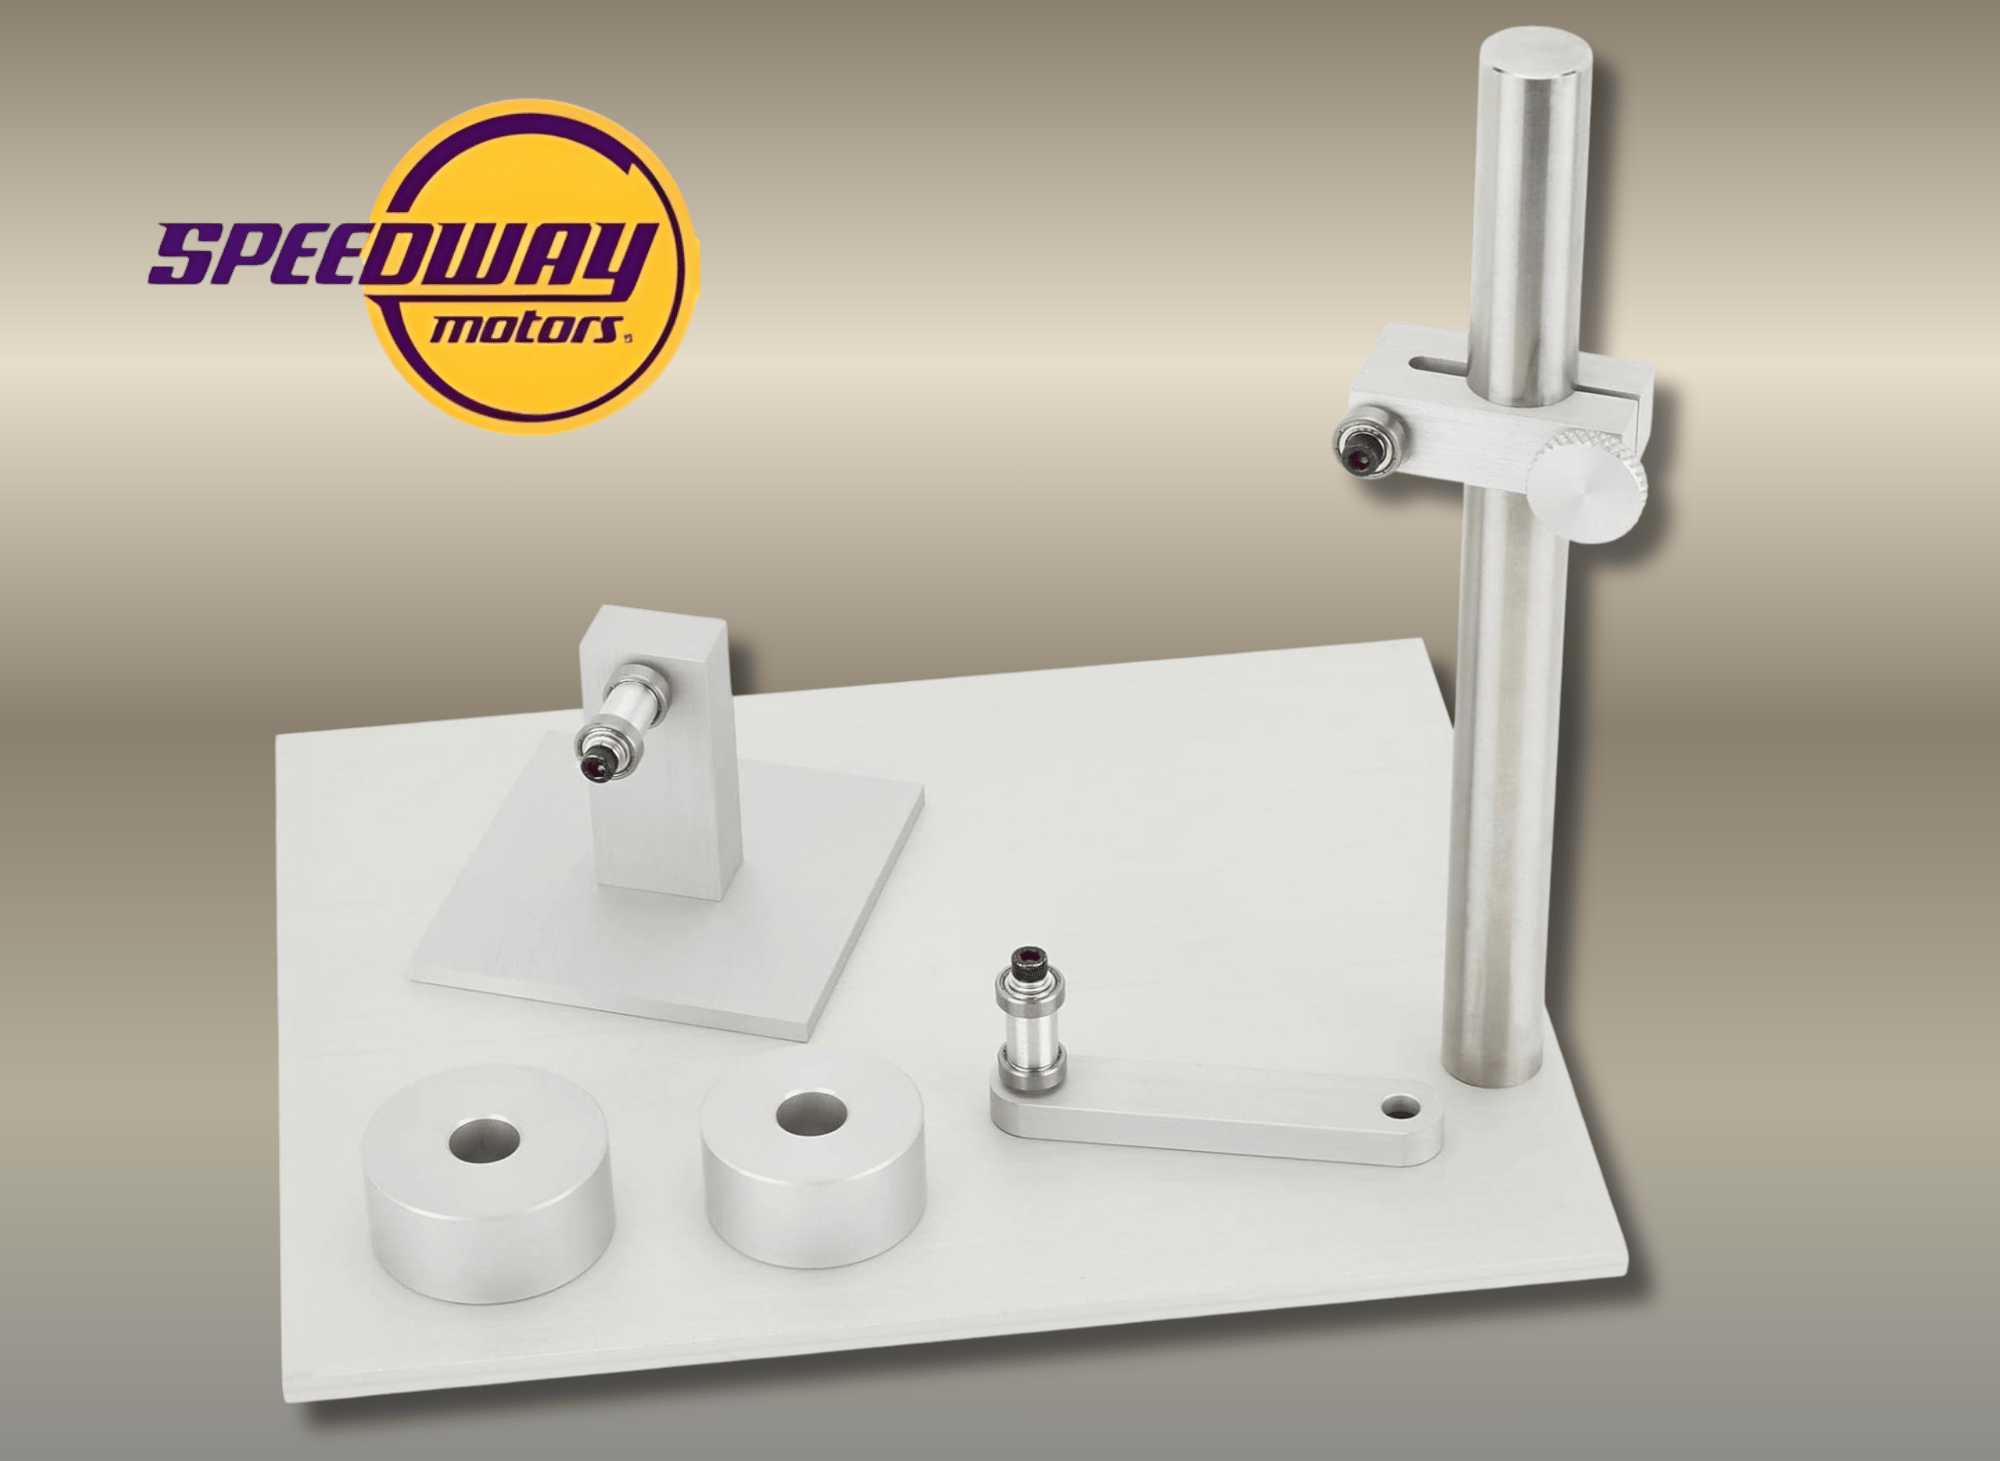
Speedway Motors Connecting Rod Balancing Stand
Aluminum Rod Weight Fixture with Bearing-Mounted Arms for Measuring Bob Weights and Matching Rod Ends, Fits Most Engine Scales
Speedway Motors Connecting Rod Balancing Stand
Speedway Motors offers a stand that focuses on ease of use and precision.
- Construction: It features an All-Aluminum Construction, making it resistant to corrosion and easy to move around the shop.
- Features: It utilizes bearing-mounted support arms for smooth rotation, which is critical for consistent readings.
- Compatibility: It is compatible with most scales, allowing you to slide your existing digital scale under the weighing end.
- Price: Priced around $339.99, it is a premium option designed for repeated use.
The Role of the Rotating Assembly
At the heart of every engine lies the rotating assembly, a dynamic system responsible for converting the explosive energy of fuel combustion into the rotational force that powers your vehicle. This assembly is made up of the crankshaft, connecting rods, and pistons, all working in harmony to deliver smooth, efficient power.
The crankshaft serves as the main axis of rotation, and its balance is crucial for minimizing vibration and ensuring the engine runs smoothly at all speeds. Connecting rods play a pivotal role in this process, linking the pistons to the crankshaft and transmitting the force generated during combustion. The big end of each rod attaches to the crankshaft, while the small end connects to the piston pin, and both ends must be precisely balanced to prevent uneven movement and stress within the engine.
Balancing the rotating assembly is a detailed process that involves measuring the weight of each component, the crankshaft, connecting rods, and pistons, and making precise adjustments as needed. By carefully balancing the big end and small end of each rod, you can eliminate harmful vibrations, protect engine bearings, and ensure that the entire assembly spins freely and efficiently. This attention to detail is what separates a reliable, high-performance engine from one that’s prone to failure.
How to Use a Connecting Rod Balancing Tool
Using a connecting rod balancer requires patience and attention to detail. Here is a general step-by-step process.
- Set up the Fixture: Place your balancing stand on a flat, level surface. Ensure the bearing-mounted arm spins freely. Place your scale under the weighing platform of the jig. Make sure all components are securely attached to the fixture for accurate measurement. Some homemade jigs require drilling a hole in the support arm or base to fit bearings or set screws.
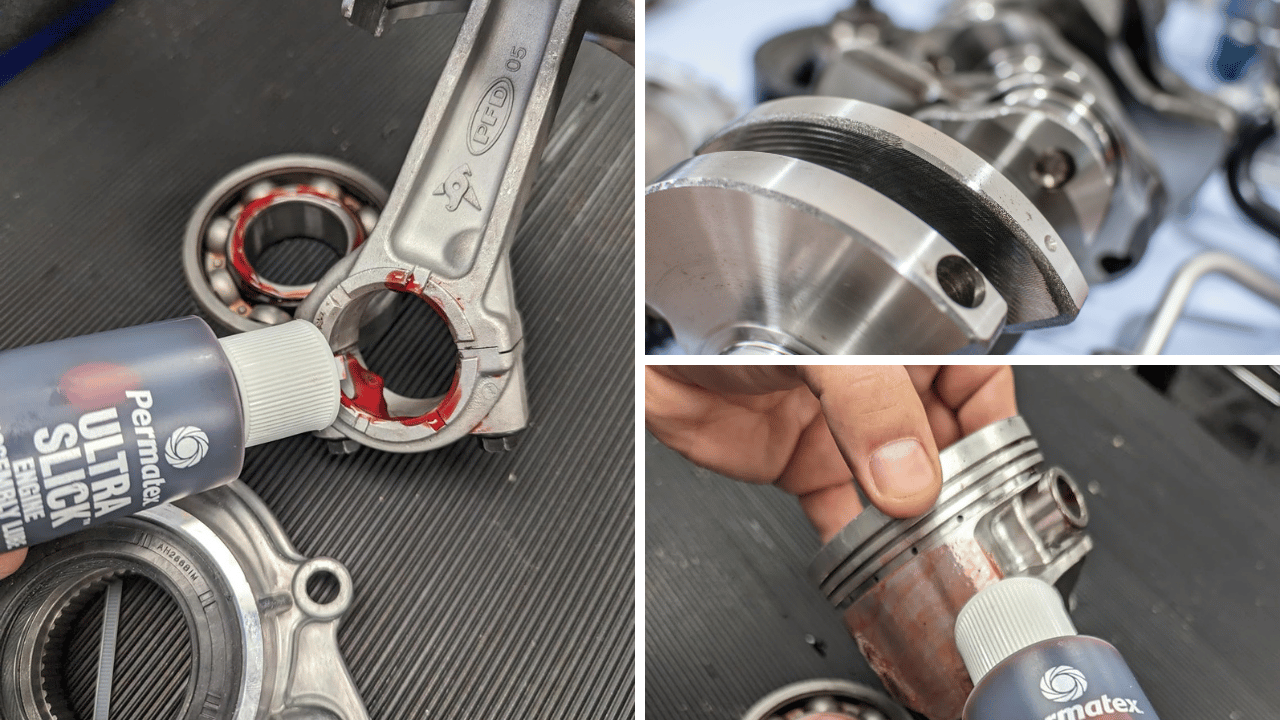
- Prepare the Rods: Clean all con rods thoroughly. Remove any oil or debris. Make sure the rod cap is torqued to spec with the bolts and nuts installed. If you are using floating pins, do not install them yet. Note any weight marks or stamps on the rod cap or big end, as these are used for matching rods.
- Find the Lightest Rod: Weigh all your rods to find the total weight. The lightest rod will be your “target” weight. You will remove material from the heavier rods to match this one. When calculating the total weight for bobweight simulation, be sure to include piston rings and wrist pins.
- Measure the Big End: Place the small end of the rod on the support arm of the fixture and let the big end rest on the scale adapter. Adjust the height so the rod is perfectly horizontal. Record the weight. Repeat for all rods. The rod must be properly centered and supported for accurate measurement.
- Measure the Small End: Flip the rod. Hang the big end on the support arm or pivot and let the small end rest on the scale. Record the weight.
- Calculate the Difference: Compare the big-end weight and small-end weight of all rods against your lightest target rod.
- Remove Material: To balance, you must remove weight from the heavier rods to match this one. Material is typically removed from the counterweight balance pads on the connecting rods.
- Big End: Material is usually removed from the balancing pad on the rod cap. You can use a belt sander or a grinder, but go slowly. For performance builds, precision tolerances are important, usually targeting within ±0.1g to ±0.5g for maximum efficiency.
- Small End: Material is usually removed from the balancing pad on the top of the small end.
- Caution: Never remove material from the beam or high-stress areas. Only grind the designated balancing pads.
- Re-Weigh: Frequently place the rod back on the tool to check your progress. It is easy to remove material, but impossible to put it back.
- Final Check: Once all rod caps and small ends match the weight of your target rod (usually within +/- 0.5 grams), your set is balanced. Using a connecting rod balancer in performance builds enhances reliability and allows for smoother, more efficient power delivery.
Note: High-performance rods and pistons may have different weights, necessitating recalibration of the rotating assembly for balance.
Note: The flywheel should be included in the dynamic balancing process of the rotating assembly for best results.
Safety Precautions: Always wear eye protection when using a belt sander or grinder to remove metal. Ensure the rod is cool before weighing, as heat can slightly affect measurements and your scale. When balancing the entire assembly, spinning the crankshaft assembly on a balancing machine helps detect and correct imbalances.
Buying Guide: Factors to Consider
Before you assume every tool is the same, consider these factors to ensure you buy the right one for your build.
- Budget: Prices range from under $100 for basic homemade-style jigs to over $300 for professional stands like the Speedway Motors model. Decide how often you will use it. If this is a one-time job, you might look for a cheaper option, but remember that accuracy costs money.
- Material and Build Quality: Look for fixtures made of Aluminum or Steel. Plastic parts can flex, throwing off your measurements. A rigid base board or metal plate is essential for consistent results.
- Compatibility: Ensure the fixture can accept the length of your rods. Some jigs have adjustable lengths to accommodate everything from a short 4-cylinder rod to a long diesel rod. Also, check if the mandrels fit the diameter of your big-end and small-end bearings.
- Scale: If the kit doesn't come with a scale, you will need to buy one. Don't use a cheap scale; look for one that measures to at least 0.1 grams.
Maintenance and Care
To keep your balancer accurate, keep it clean. Metal dust from grinding can get into the bearings of the support arm, causing friction that ruins your measurements. Wipe down the tool after every use.
Periodically check the calibration of your scale using a known weight. If the fixture uses a chain or hanging method, ensure the links aren't kinked. Store the tool in a dry location to prevent rust on the steel components. If the tool uses a mandrel or spacer to hold the rod, ensure they are free of burrs that could scratch the rod bearings.
Achieve Smoother RPMs Today
Investing in a connecting rod balancer is a smart idea for anyone serious about engine performance. Whether you choose the Proform 66844 or the Speedway Motors stand, the ability to weight match your big end and small end independently allows for a smoother, more durable rotating assembly.
By taking the time to measure, balance, and verify your connecting rods, you ensure your engine can handle high RPMs without shaking itself apart. It’s a process that requires patience, but the result, a perfectly balanced engine, is well worth the effort.
Thank you for reading!
Your friend,
Todd
#ConnectingRodBalancer ⚙️ #PrecisionEngineering 🛠️ #AutomotiveTech 🚗 #EnginePerformance 💨 #MachineryMatters 🏭 #BalancedPower 💪 #TechInnovation 🔧 #EngineeringExcellence 🌟 #MechanicalMastery 🔩 #EfficiencyBoost 🚀